Thursday, October 31, 2013

Evaluation

What have you learnt by doing this exercise?


By doing this excersise i have learnt a number of things. I've learnt about different camera angles and why we use them, this is good experience for when i do my final task. I also have learnt how to use Adobe Premier Elements, which again is very useful when i get to making my final task. We learnt that the location and setting plays an important part in making a short video and that we have to think carefully why we have chose that location. I have learnt that its a lot harder to film and put together a short video than you think. The acting in our video could of been alot better and more realistic as it looked quite awkward watching it back. Also the editing is very difficult to get the right shot playing at exactly the right time, along with the music. Our music sounded very odd as it didnt fade out when the speaking started in the shots.

What skills have you developed?

Skills i have developed from doing the Preliminary Task are, how to edit clips, cut them and make the speed up/slowdown. I've also learnt how to use a camera and zoom in and out on the camera, while using a variety of different shots. I have developed editing skills on the Adobe Premier Elements software. Ive learnt how to insert music into the clips and to fade the music. However i do need to practice editing more as i still could improve on my editig skills. I ave also learnt how to use a camera and where to place the camera to get the best shot.

What feedback have you received?


These are comments from some members of my media class.

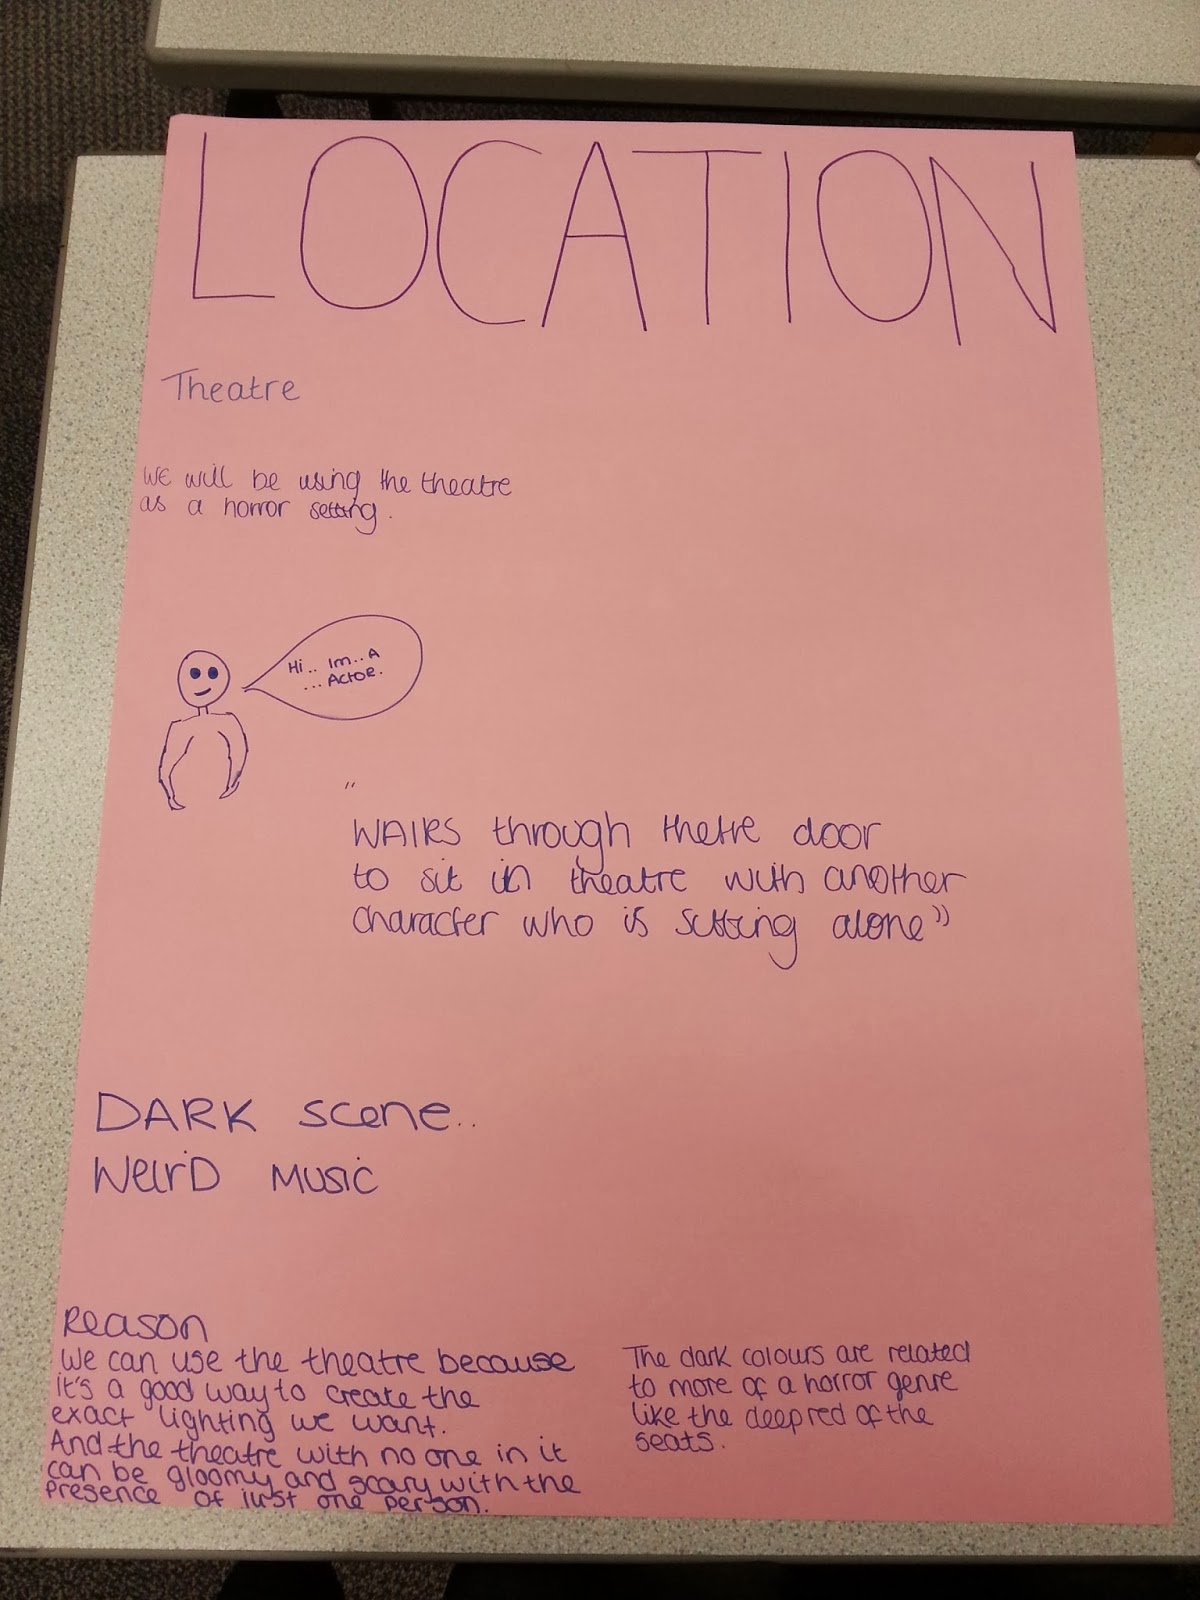
How would you improve your Preliminary Task?

To improve my preliminary task i would make sure the acting of the characters is better and that the camera doesnt wobble when recording. I would also use more effects on the shots to change the lighting and i would cut the shots so they ran more smoothly.

Wednesday, October 30, 2013

Saturday, October 26, 2013

Friday, October 25, 2013

Pictures of us filiming

We dimmed the lights to try and get low key lighting but this showed green lighting on the camera.


We made the lights brighter so it was clear when we was recording.

Jess was alone in the middle of a large room so she looked isolated and upset.


This was us filming our preliminary task.


Thursday, October 24, 2013

Key Technical Terminology

180 degree rule

In film making, the 180-degree rule is a basic guideline regarding the on-screen relationship between a character and another character. An imaginary line called the axis connects the characters and by keeping the camera on one side of this axis for every shot in the scene. The first character will always be to the right of the second character, who is then always left of the first character.

cut on action

Cutting on action or matching on action refers to film editing and video editing techniques where the editor cuts from one shot to another. Although the two shots may have actually been shot hours apart from each other, cutting on action gives the impression of continuous time when watching the edited film.


eye-line match

An eye-line match is a film editing technique associated with the continuity editing. It is based on the idea that the audience will want to see what the character on-screen is seeing. The eye-line match begins with a character looking at something off-screen, followed by a cut to the object or person at which he is looking.


continuity editing

Continuity editing is the main style of film editing and video editing in the production process of filmmaking of narrative films and television programs. The purpose of continuity editing is to smooth over the natural break of the editing process and to establish a consistency between shots.

Wednesday, October 23, 2013

Planning our Preliminary Task

This a sped up video of us discussing ideas for our preliminary task. We came up with a number of ideas for the task, each with different themes. However we thought horror would be a good theme to do for a preliminary task as there was lots of things we could do to create a scary atmosphere.

After thinking further into our horror idea we realised that it would include alot of unnecassary work, as our preliminay task would not be marked. We came up with another idea to with a simple script that ticks all the requirements which we needed. We wrote a script and decided jess and kayleigh would be the characters in it with me and hannah recording it. We decided our location would be in school, in the theatre as this was easier and it fits well with the Mise en scene.


Moodboard

Here we created a moodboard of different horror themed images, these inspired us with ideas for our preliminary task.


Loacation


We had to brainstorm ideas of a location to use. We also wrote down things that would make a good horror location and why. We put things down such as low key lighting, to create a dark eerie atmosphere...

Our location

This was our location for our preliminary task. We chose this loaction as the setting for our task was a school, so we then chose the theatre because of the fact its very large. We wanted to chose a large place to film this so we could empahsise the fact the girl feels alone, while she was sittin by herself with loads of charis surrounding her where people could be sitting, but theyre not, and shes completly alone.


Representation

Stereotypes
- 'visual shortcut' repeated so often that we assume they ae normal or true

Archetypes
- this is the 'ultimate' stereotype. eg. the white stiletto wearing, big-busted, brailess blonde bimbo

Countertype
- a representation that challenges tradition stereotypical associations of groups, people or places

Mise En Scene

*a french term meaning what is put into a scene of frame

*visual information in front of the camera

*communicates essential information to the audience

Key Elements

*settings and props
*costume, hair and make-up
*facial expressions and body language
*lighting and colour
*positioning of characters/objects within the frame

Golden Rules

Rule One
If you use Prezi or Microsoft powerpoint to present your work and what you have learnt, don't over use it as there are many other ways to presenting your work, such as in videos or pictures of the work you've done in lessons.

Rule Two
Be as creative as you can with your blog, play around with different fonts, add videos, pictures etc.

Rule Three
Don't copy other peoples blogs, use your own work and don't just copy it off other people or the internet.

Rule Four
Make sure your evaluations are well thought out and use key words.

Rule Five
Try and present what you have learnt in every lesson, to show people that you are understanding what you're learning about.

Rule Six
Make sure your blog is easy to navigate through and it is easy to find every thing you have written about. eg, put titles for all the work you upload to explain what its about.

Camera Angles

MY OWN CAMERA SHOTS

Long Shot

Low Angle

Close Up

Medium Shot

Low Angle

Medium Shot

Long Shot
 
 
CAMERA ANGLES


Sunday, October 20, 2013

The Brief


Our a brief was to create a 2 minute video for opening titles of a horror film. I was excited by this brief as I knew that I could explore some of my own interests in film.


Friday, October 11, 2013

Group Dynamics

Our Main Task Group


Kayleigh is one member from our group. She was the woman in our horror opening titles. She also recorded some of our clips and helped edit.


Joe was the clown in our horror opening titles. He filmed some shots of kayleigh and edited them.
I recorded Joe and Kayleigh and held the microphone when Joe was recording Kayleigh. I also edited some of the clips and helped put the opening titles together.